First of all I'd like to give all thanks to Sarah at Onbag for allowing her pattern to be used for personal use for those of us that are Sewing Machine inclined :)
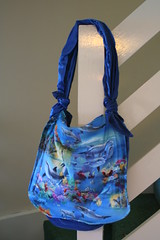
I used the same fabric as I did on my DIY-tai and I love that they are all matchy matchy :D
All the hems are rolled, rolled hems are a new technique to me and it almost put me off starting it but after I'd done just the first couple of inches and got round my first corner I was really comfy with doing the rolled hem and even stopped pinning them after a while and just rolled on the stop/start instead (I hate pins anyway so any excuse really) It too me ages inbetween the kids and getting other stuff done but I still reckon I put about 25hours into it and every second was worth it and I'm now planning my next one... I think it might be purple :)
I love bags but I don't really DO bags lol all that having to hold on to something and remembering to pick it up if I put it down somewhere so I don't lose it :( (I've lost loads of stuff by leaving it at my bum :() anyway no probs there with this bag, it's really comfy on the shoulder, it can be a rucksac too if I wanted and the best thing is, I love it so much I could NEVER forget about it YAY!

The red bit is the original, bonafide, the real thing Onbag DIY label available from the lovely Sarah herself :)

This is the bottom of the bag, I put an extra hem that looks like a rolled hem between the bottom of the side pocket and edge of the bag bottom to add some extra structure to the bottom of the bag :)

I made the front flap 3 inches wider and 3 inches longer to give better coverage to the front of the bag but also so I could get more of the lovely dolphins pattern in :D


0 comments:
Post a Comment